
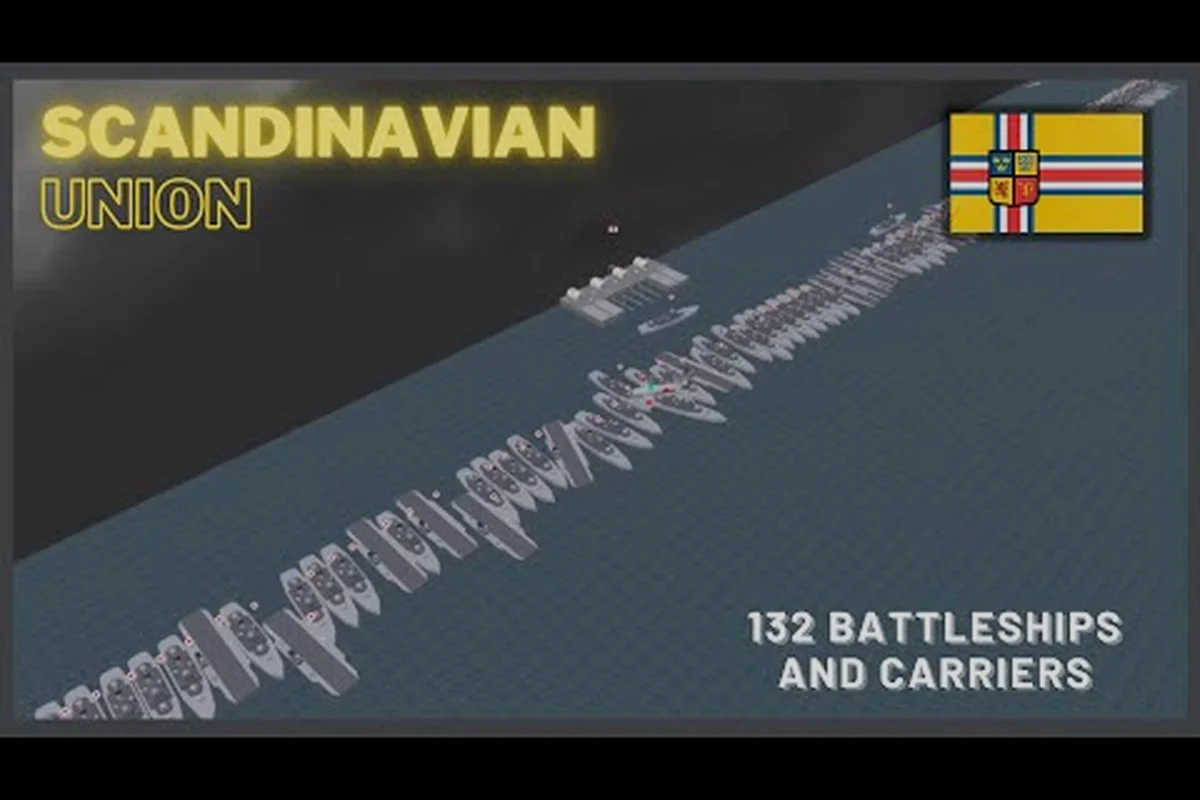
Sailing into a new Roblox match of Navy War without a plan usually ends with a destroyed dock and an empty resource pool. According to the Navy War on Roblox official page, the game blends island base-building with PvP fleet combat, and the difference between a coordinated flotilla and a scattered mob of ships is often the only thing standing between victory and a respawn screen. This guide lays out the Navy War naval strategy basics that new captains need before their first real engagement, from the dock-tier ladder to the five ship classes that decide every fight. We will walk through the co-op mode loop, the island base capture system, and the fleet formations that experienced players reach for when the channel turns red.
Navy War Naval Strategy Basics: Reading the Battlefield
Navy War drops up to six players onto procedurally arranged island chains, where every captain starts with a single small dock, a handful of credits, and roughly five minutes before the first hostile fleet can reach their shoreline. The core loop is straightforward on paper: build economy, expand shipyards, push the map, capture new islands. In practice, the decisions you make in the first eight minutes shape every battle afterward, which is why a working grasp of the Navy War naval strategy basics matters more than raw clicking speed in the first engagement.
The game supports both solo play and co-op mode, and according to community data the cooperative route is where most beginners learn fastest because teammates can cover different jobs: one captain pushes economy while another scouts the horizon. The map itself is divided into shipping lanes, neutral ports, and capture-able island bases, each of which can be fortified, raided, or contested depending on the match phase.
The Three-Phase Match Structure
Most Navy War matches follow a three-phase rhythm that rewards patience early and aggression late: a 0–8 min Early Build window where one destroyer outweighs a frigate swarm, a Mid Expansion stretch at 8–18 min where neutral island captures swing your economy from 1–3 to 4–8 ships, and a Late Domination phase at 18+ min where 8+ ship fleet battles and shipping-lane sieges decide the match. Reading the timer and minimap tells you whether to spend resources on a shipyard upgrade or save them for a battleship push.
| Phase | Typical Duration | Primary Goal | Fleet Size | Risk Level |
|---|---|---|---|---|
| Early Build | 0–8 min | Establish dock + first shipyard | 1–3 ships | Low skirmishes |
| Mid Expansion | 8–18 min | Capture neutral islands, upgrade economy | 4–8 ships | Medium patrols |
| Late Domination | 18+ min | Siege enemy base, control shipping lanes | 8+ ships | High fleet combat |
During the Early Build phase, the smartest move is to keep your fleet docked and pour resources into the shipyard because a single destroyer can intercept a scouting frigate but cannot win a pitched battle. The Mid Expansion phase is when island captures start paying off, and the Late Domination phase usually decides the match. Skipping phases or trying to rush the late game almost always backfires because enemy captains who defended well can field battleships while you are still launching cruisers.
Ship Roles and Battlefield Positioning
Navy War ships fall into five classes, and each one has a tactical job that fits a specific phase of the match. The class you build first is the class that defines your early-game identity, and many new captains who ignore the role split end up with a fleet of one type and no clear frontline.
| Class | Hull Cost | Primary Role | Best Phase | Co-op Synergy |
|---|---|---|---|---|
| Destroyer | Low | Scout, harass, screen | Early Build | Flank and spotting |
| Cruiser | Medium | Balanced line holder | Mid Expansion | Frontline anchor |
| Battleship | High | Heavy burst, siege | Late Domination | Spearhead push |
| Submarine | High | Stealth ambush | Any phase | Trap and pick |
| Aircraft Carrier | Very High | Area denial, recon | Late Domination | Zone control |
The destroyer is the workhorse of the early game because it is cheap, fast, and can dodge submarine torpedoes with a timely turn. Cruisers form the spine of most competitive fleets in the Mid Expansion phase, while battleships and carriers are the finishers that win the Late Domination phase. Submarines are a special case: they are fragile on the surface but devastating in ambush lanes, and they are the single most underused class by players who have not yet read the naval combat fundamentals in our combat guide.
Co-op Mode Tips: How to Play Navy War With Friends
Co-op mode is where the game stops feeling like a solo resource race and starts feeling like a small-scale wargame, because each captain can take on a job that a single player would struggle to manage alone. According to community reports, the co-op mode supports small squads of two to six captains on the same server, and the match only really opens up once players begin to specialize. A good co-op squad runs a balanced roster, communicates target priority, and avoids the classic trap of everyone building the same ship class at the same time.
Building a Balanced Co-op Roster
A squad that all rushes battleships is a squad that has no scouts, no flankers, and no idea what is coming. A more useful co-op plan starts with role assignment before the first resource tick. The table below shows a simple two-, three-, and four-player split that experienced crews have settled on.
| Squad Size | Economy Captain | Combat Captain | Support Captain | Optional Role |
|---|---|---|---|---|
| 2 players | Build, dock, defenses | Fleet, scouting, sieges | — | — |
| 3 players | Build, shipyard upgrades | Main fleet control | Submarine ambush lane | — |
| 4 players | Build, trade routes | Frontline battleships | Destroyer screening | Carrier zone control |
| 5–6 players | Split economy (1–2) | 2 fleet captains | Sub + destroyer screen | Carrier + reserve |
The Economy Captain in a three-player crew is the one who never leaves the home island, and that role is more interesting than it sounds because they decide when the squad can afford a battleship push and when to hold back. The Combat Captain runs the fleet and calls targets, while the Support Captain plays the submarine or destroyer lane and punishes overextended enemies. When you are learning Navy War naval strategy basics, sticking to this three-role split is a fast way to stop dying to ambushes.
Voice and Ping Etiquette
Navy War does not include a built-in voice system for every match, so most co-op crews rely on the in-game ping wheel and an external Discord. Even with a ping wheel, the quality of your team's communication is decided by what you ping, not how often. Pinning every resource node is noise; pinning the enemy fleet, the neutral port, and the contested island is signal.
-
Ping the enemy fleet composition whenever you spot it, because your combat captain cannot make a counter call without knowing whether a battleship or a submarine is in the lead.
-
Ping neutral ports before the squad commits to a capture, so the economy captain can pre-stage resources for a dock upgrade.
-
Ping the island base you are defending, not the one you are attacking, because the squad tends to forget that undefended home docks lose while the offense is away.
-
Avoid pinging single resource nodes, since the economy captain already has the resource overlay and the ping only adds clutter to the channel.
Players who treat the ping wheel as a tactical map rather than a chat tool consistently win more island captures, and the habit is one of the most underrated Navy War co-op mode tips you can pick up in your first ten matches. Once your crew is comfortable with pings, a quick voice rule of "ping before you speak" prevents two captains from issuing contradictory calls at the same moment.
Island Base Guide: Capturing, Holding, and Upgrading
The island base is the heart of every Navy War match, because the dock is where ships are built, the shipyard is where they are upgraded, and the defenses decide whether an enemy push breaks your economy or bounces off your coastline. Capturing a neutral island is a one-time investment that pays off for the rest of the match, and the difference between a held base and a lost base is almost always a question of dock-tier awareness, garrison timing, and shoreline defense. This section is your Navy War island base guide for the moments when the map opens up and the capture race begins.
Dock Tiers and Their Production Output
Every dock in Navy War can be upgraded through a tier ladder, and each tier both increases the build speed and unlocks new ship classes. The table below summarizes the practical thresholds, although exact values may vary by patch and should be cross-checked with the Navy War on Roblox official page after major updates.
| Dock Tier | Unlocks | Build Speed | Garrison Slots | Cost Tier |
|---|---|---|---|---|
| Tier 1 | Destroyer | 1× | 2 | Free starter |
| Tier 2 | Cruiser | 1.4× | 3 | Low |
| Tier 3 | Battleship | 1.8× | 4 | Medium |
| Tier 4 | Submarine | 2.2× | 5 | High |
| Tier 5 | Aircraft Carrier | 2.7× | 6 | Very High |
The decision to push from Tier 3 to Tier 4 is the single biggest inflection point in most matches, because once a captain has submarine access, the ambush lane opens up and the enemy fleet can no longer sail in straight lines. Captains who skip straight from Tier 2 to Tier 5 are usually the ones who lose their home dock in the Mid Expansion phase, since they spent resources on the carrier while leaving a thin cruiser screen at home.
Capture Flow Step by Step
Capturing a neutral island follows a fixed four-step flow, and the captains who memorize it are the ones who chain three captures in a row without losing a ship. The rhythm matters because every dock you flip pushes the front line outward, which in turn shortens the supply run for your screening destroyers and stretches the enemy response window. A run of three back-to-back captures, timed roughly 90 to 120 seconds apart, is usually what tips a Navy War co-op match from a slow grind into a decisive map swing.
-
Scout the island with a destroyer or a cheap cruiser to confirm the dock is neutral and no enemy fleet is already on the way. Skipping this step is the most common reason a capture squad gets ambushed in the channel.
-
Move the fleet into the capture ring and hold position until the capture bar fills. The capture ring is short, so the fleet cannot sail away to dodge a counterattack, which is why the timing of step 3 matters.
-
Ping a defensive screen one channel over, because a fleet that is busy capturing is a fleet that cannot fight, and the screen buys the time the capture bar needs.
-
Upgrade the new dock the moment the capture finishes, and start producing a garrison ship before any other captain can rally a counter-push. The first ship out of a captured dock is the difference between holding and losing the island.
The "upgrade before producing" rule is one of the Navy War co-op mode tips that experienced crews will mention without being asked, and the reason is simple: a captured dock at Tier 1 is a liability, while a captured dock at Tier 2 is an asset. If you are learning the Navy War naval strategy basics for the first time, focus on the timing of step 4 because the upgrade timer runs while enemy scouts are already headed your way.
Fleet Formations and Combat Engagements
Once you have at least four ships on the water, formation begins to matter as much as class composition, because the side that enters a fight in a clean line usually trades efficiently while the side that is scattered loses ships to focused fire. Navy War combat happens in open lanes and around island chokepoints, and the formation you choose tells your team which job each ship is doing. This section is where the Navy War naval strategy basics get tactical, and where the difference between a coordinated flotilla and a solo queue really shows.
Three Core Formations to Learn First
New captains do not need to memorize a dozen formations; they need to know the three that cover about 90% of the engagements they will see in the first twenty matches. Line Ahead, Wedge, and Screen are exactly those three, and mastering their trigger conditions (open-water duel, island assault, and contested approach) lets a new division handle 18 of its first 20 randoms without swapping layout, which is why veteran players in navy war co-op lobbies keep the same three bindings on their hotbar and only swap when a fourth "Turtle" or "Diamond" formation is called out by the div lead.
| Formation | Ship Layout | Best Use Case | Weakness |
|---|---|---|---|
| Line Ahead | Ships in a single row, broadside-to-broadside | Open lane duels, equal fleets | Vulnerable to submarine flank |
| Wedge | Lead ship forward, two wings angled back | Breaking enemy lines, island assaults | Disperses focus fire |
| Screen | Destroyers forward, capital ships behind | Approaching contested island | Slow if destroyer line is broken |
Line Ahead is the default formation for fleet duels because every ship can fire its broadsides at once, which maximizes damage per volley. Wedge is what you use when the enemy is dug in around an island and you need to punch through a defensive ring, because the lead ship soaks the first tower shots while the wings envelop the formation. Screen is the formation that beginners forget, and it is the one that wins ambushes, because destroyers at the front can spot and kill submarines before they get a clean torpedo angle on your battleships.
Target Priority and Focus Fire
Winning a fleet fight in Navy War is rarely about how many ships you have; it is about which enemy ship your fleet deletes first. The community-tested priority order below is what experienced combat captains call before every engagement, and it is one of the cleanest Navy War co-op mode tips you can teach a new squad.
-
Submarines first, because a submarine in your backline deletes battleships faster than any other ship can answer. A destroyer screen is the answer, not a battleship pivot.
-
Carriers second, because their zone control can pin your fleet in place for the rest of the enemy line to volley into. Killing the carrier lets your ships maneuver again.
-
Battleships third, because they are the burst damage dealers but they are slow and punished by cruisers that can stay in their blind arc.
-
Cruisers fourth, because they are sturdy line holders but they do not usually end fights on their own.
-
Destroyers last, because they deal light damage and only matter if they have been screening submarines all match.
Calling target priority out loud before a fight starts is a habit that most beginners skip, and it is one of the cheapest upgrades you can make to your co-op play. Even a one-line call of "subs, then carriers, then battleships" before a push is enough to stop the squad from splitting fire across five targets at once.
Economy, Resource Flow, and Match Pacing
Navy War is a strategy game, and strategy games live or die on economy, because the captain with the bigger resource pool builds the bigger ship, and the bigger ship wins the next fight. The Navy War naval strategy basics are incomplete without a section on credit flow, dock upkeep, and the pacing decisions that decide whether you are the captain pushing or the captain being pushed.
Core Resources and What They Buy
Navy War runs on three primary resource types — Credits, Steel, and Fuel — and each one feeds a different part of your war machine, so knowing which resource to stockpile before a push is half of good pacing. Credits keep your ports and shipping lanes generating passive income, Steel gates the jump from Tier 3 to Tier 4 dock upgrades, and Fuel dictates whether your fleet can project power into a contested lane or retreat when overextended; misjudging the order in which you spend them is what turns a winnable campaign into a stalled economy. The table below breaks down where each resource comes from, what it unlocks, and the threshold you should treat as your "do not touch" floor before committing to an offensive.
| Resource | Primary Source | Spends On | Save Threshold |
|---|---|---|---|
| Credits | Shipping lanes, ports | Ship hull cost, repairs | Always positive |
| Steel | Mines on captured islands | Shipyard upgrades, dock tiers | 2× next upgrade cost |
| Fuel | Refineries, supply ships | Fleet movement, retreat | Match phase dependent |
Credits are the daily bread of your economy and they refill automatically as long as you hold a port or a shipping lane. Steel is the choke resource that decides when you can move from Tier 3 to Tier 4 dock, which means saving steel before a major push is more important than spending it on a single extra cruiser. Fuel is the resource that beginners ignore, and a fleet that runs out of fuel in a contested lane cannot retreat and cannot advance, which is one of the most common ways an overextended push turns into a loss.
Match Pacing Rules of Thumb
Three pacing rules cover most of the timing decisions a new captain has to make, and they are simple enough to apply during a real match without freezing up. The idea is to compress the early-game decision tree into three repeatable triggers: when to commit steel, when to open a second dock, and when to hold a finished hull in reserve. Once those three triggers are automatic, the rest of the navy war naval strategy basics — scouting, target priority, and dock rotation — falls into place because every action has a preset time window. Veterans lean on these rules precisely because they remove the hesitation that costs matches in the first ten minutes.
-
Do not start a second dock before the first one is at Tier 2, because a scattered economy is a fragile economy. One strong dock beats two weak ones in the early game.
-
Save steel for one big push, not three small ones, because three small upgrades lose to one big upgrade when the enemy fleet shows up with battleships.
-
Build one extra ship during the Early Build phase, and keep it docked as a reserve. The reserve ship is the answer to a surprise submarine, and it often turns a losing fight into a winning one.
These rules are the kind of Navy War co-op mode tips that you will see veterans repeat in every Discord, and the reason is that they translate into concrete actions during a match. Apply them and you will already be ahead of most first-time captains, which is the whole point of the Navy War naval strategy basics: turn raw clicking into a plan that holds water.
Frequently Asked Questions
What is the best ship class for beginners in Navy War?
The Destroyer is the best starter ship because it has the lowest hull cost, the highest speed, and the ability to scout and screen at the same time. New captains can use destroyers to learn how capture rings, ping wheels, and ambush lanes work before committing to the more expensive battleship or carrier lines. Once you have the destroyer role down, the cruiser becomes the natural next class to add to your roster.
How do I play Navy War with friends in co-op mode?
Start a private server from the Roblox game page and invite your squad before the match begins, then assign one captain to economy, one to fleet, and one to support. According to community data, the co-op mode supports small crews of two to six, and the matches where players pre-assign roles before the first resource tick win more island captures than the ones where everyone plays the same job. Voice chat through Discord is the easiest way to call target priority, and the in-game ping wheel covers most of the tactical calls.
How do I capture an island base quickly?
Send a destroyer scout first to confirm the island is neutral, then move your full fleet into the capture ring while a second ship screens the entry lane. The capture bar fills in roughly 30 seconds on a neutral port, and you should start the dock upgrade the moment the capture finishes because the first ship out of a captured dock decides whether you hold the island. Skipping the screen is the most common reason a capture squad gets rolled by a counter-fleet.
Which dock tier should I push first?
Push from Tier 2 to Tier 3 as soon as you can, because the battleship unlock is the single biggest power spike in the early game. The jump from Tier 3 to Tier 4 is the next most important, since submarines open up the ambush lane and let your fleet break the enemy's straight-line formations. Saving steel for these two specific upgrades is the pacing rule that most beginners learn the hard way.
What is the best fleet formation for a 4-ship squad?
Use Line Ahead for open lane duels, Wedge for island assaults, and Screen when you suspect submarines. For a four-ship squad, the cleanest Line Ahead is two destroyers in front followed by a cruiser and a battleship, which gives you scout coverage, frontline durability, and burst damage in a single column. When the squad grows past six ships, switch to a wider Line Ahead and pull one destroyer back into a screen role.